
How to make beautiful email signatures (without losing your mind)

Before you start: While I’d be honored for you to read through my little tutorial, a basic understanding of HTML and CSS is required to fully grasp the things I’ll be showing here, and I might not stop to explain every piece of the code I’m writing.
Intro
The first modern email, resembling what we use today was sent in 1971 by Ray Tomlinson (to himself). The Simple Mail Transfer Protocol (SMTP), used to send emails to a server, was published ten years later in 1981. The Internet Message Access Protocol (IMAP), used to retrieve emails from a server, was designed in 1986 and the current version was launched in the early 90s.
These are the current systems used to send and receive emails today in 2023. You probably noticed something about all of these dates: they start with a “1”. In technology terms, they are ancient. This is important because it defines what is and isn't allowed in a coded email signature. Modern layout features such as CSS Grid and Flexbox are not available. Neither are DIVs, which were first introduced 27 years ago, but are too modern to be reliably applied in an email.
So we’re back to the basics, fun right!? Let’s dig in.
Designing the signature
When we design an email signature, it’s important to remember our limitations. There are two big ones:
- No complex layouts. Imagine what you’d be able to build if you were designing in a spreadsheet, that’s about what we’re dealing with.
- No custom fonts. Font files cannot be sent along with the email, so if our email is opened in an app on someone’s computer or phone, only the fonts installed on that machine are available! To be safe, I recommend using web-safe fonts, specifying backups, and turning any piece of text that you absolutely need to look right into an image.
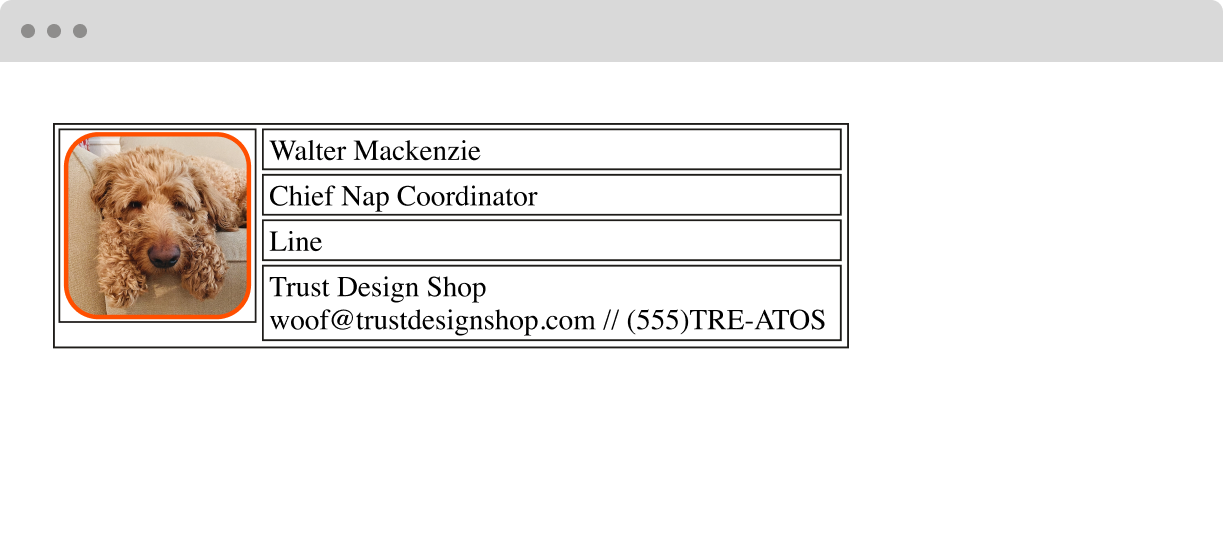
With this in mind, I’ve designed a pretty simple signature for this tutorial. I’ve avoided custom fonts entirely, and kept the layout simple with no overlapping shapes.

Before we export any images, we need to define the size. We don’t want tiny pixelated images or bloated files taking up bandwidth. My design is a little less than 350px wide, but you might need to do some trial and error on the size once you have it built. Now that everything is properly sized, we can export our image. I like to export at 2x, so our 80px image will be saved at 160px, this makes sure it still looks crisp even on Retina screens.
Building the signature
It’s coding time! We will be hand-coding our signature in HTML. As we established earlier, our modern building blocks are not available, so we will be using HTML Tables to create our layout (the entire internet used to be built this way!) I like to draw out a wireframe before I get started so I can picture my table structure. Something like this:

Here's an example of what a more complex layout might look like:

Now open up a code editor and create a new file. I use Visual Studio Code, but any will work (even plain old Text Edit). Save it as a .html somewhere you can get to, and then open that HTML file in a browser. This is the live version of our code that we can check our progress with.
First we need to define our table element. I like giving it a border to start, this will help visualize our structure as we’re building. Because we have our wireframe we know what our tables and rows should look like, so we’ll define those as well. You’ll notice that the last 3 rows only have one cell in them, that’s because the “rowspan=4” extends down into the following rows.

If you save your code and refresh the browser window with the preview, you’ll see that we’re in a pretty good spot already:

Now we need to put our image somewhere that we can link to. For our Trust company signatures, we use an AWS bucket so it all stays secure and under our control, but you can also just upload it to a free image hosting site like imgur. Wherever you decide to put it, once it's uploaded grab the direct link to the image (this link needs to end in an image extension, like .jpg or .png or else the HTML will not be able to parse it). Here's our code with the real image and email link.

Save and refresh and see where you’re at. It should look something like this:
All of our pieces are here now, but they aren’t very pretty, huh? We need some CSS. Unfortunately, because we’re in Email Land, we are required to do all of our styling in-line. This isn’t a CSS tutorial, so I’ll trust that you can handle this part. Mine looks something like this:

Save and refresh, and will you look at that! We’ve got a nicely designed and coded email signature. All that’s left is actually getting it into our emails.

Applying the signature
Applying your signature is quick and easy. Some email apps will allow you to paste in HTML code, in which case, just paste in the code we have written. Others, such as Gmail and Apple Mail, will give you a blank spot to paste text or images into. You already have your signature open on a webpage, so head there, select all, and then copy. This copies the underlying HTML code in a way that the client can read. Open your settings, create a new signature, and then paste. That’s it!
You're done!
Your email signature is designed, coded, and applied. Your emails are now professional and branded. Maybe you’re showing off your nice company logo, maybe you’ve put your nice face in there so it feels like people are emailing with a real person, or maybe you’ve filled it with 20 links and buttons pointing people to your various scams and schemes. Either way, I hope this was helpful and easy to follow and not too long. Thanks for reading!
Bonus Expert Level Challenges
- Add animation or a moving profile picture with GIFs
- Use a nested <table> element inside a <td> to create a grid of separately clickable social media links.
